Thursday, September 3, 2020

What is Dry Needling?

More and more often we are getting patients who walk in our doors with a referral that mentions dry needling, or people coming in off the recommendation of a friend who may have received dry needling during their course of treatment. A pretty common thread we see is that these patients have no clue what dry needling is or how it is used in a PT plan of care. So follow along for a look into this tool!

It’s the same as acupuncture, right?

Wrong! 

While dry needling uses the same needles as an acupuncturist would, the technique is completely different. 

Dry needling targets the muscular level, either to release a trigger point or reset the firing of the nervous system to that particular muscle. 

The technique is named “dry” because the needle is solid with no well in it for delivery or extraction of fluids. Because of this, the needles are extremely thin and often a patient doesn’t even feel it when the needle breaks the skin. 

Is dry needling a quick fix for my pain?

Short answer, no. 

We use a lot of different tools in PT to help alleviate pain, and this is just another tool. It does have the ability to quickly decrease pain, which is great because then we can train the associated muscles or movement patterns. 

However, our overall goal is to figure out WHY you are having that pain, and attack it at the source. 

Are there different ways to dry needle? 

As with anything, there are varying techniques to this tool we use. 

One technique is “pistoning” where the needle is moved in and out to target a trigger point release. 

Another technique is “functional dry needling” where the PT inserts the needle into the muscle and leaves it there, connecting electric stimulation at varying levels to either fatigue that muscle out and force it to relax, or create more input to get that muscle to activate. When that happens, patients’ feel a heartbeat sensation in the muscle. 

As with anyone that walks through our doors, we perform complete evaluations of your entire body, not just the particular part ailing you, and use that to inform our clinical decision making for the best plan of care that is individualized to you.

With that being said, this dry needling tool may not be used on your first visit, but we are constantly thinking through what the best tools are to use in your case! If you have any questions about how dry needling could pertain to your injury or symptoms, don’t hesitate to reach out!

The post What is Dry Needling? appeared first on FX Physical Therapy.


Thursday, August 27, 2020

Volleyball: Common Injuries and How to Prevent Them

Whether you play on the sand or on the court, volleyball has become an increasingly popular and fun sport. A comprehensive training program is key in keeping volleyball players injury free, especially those playing year round. Volleyball injuries tend to be caused by overuse or from a quick directional change.

Let’s review some common causes of injuries, types of injuries, and ways to prevent them! 

Common Causes of Injuries: 

  • Imbalance in flexibility and strength – An imbalance, whether in flexibility, strength or both, can affect your form and your ability to improve in power and performance. Imbalance frequently turns into overuse injuries.
  • Poor body control – Lower body injuries can be caused by a lack of balance or control of the body while running, cutting, pivoting, or when jumping and landing.
  • Improper landing technique – Improper landing mechanics can place increased stress on certain parts of the lower body creating overuse injuries, sprains, strains, or tendinopathies. 

Common Volleyball Injuries:

  • Shoulder Impingement/Rotator Cuff Tendonitis  – Because of the repetitive overhead motion with spiking and serving, shoulder overuse injuries to the rotator cuff are common.
  • Ankle Sprains – Ankle sprains can occur from running, cutting, pivoting, and landing incorrectly or on someone else’s foot. 
  • Patellofemoral Pain/Patellar Tendonitis – The patellar tendon, which attaches the patella (knee cap) to the tibia (shin bone), becomes irritated from overuse or repetitive forceful jumping, especially with improper  jumping mechanics.
  • Wrist and Hand Injuries (Sprains/Strains) – Fingers and hands are vulnerable to injury during blocking, setting, and spiking.  

Preventing Injuries: 

  • Strength training – During the off season, full body strength training should be performed. Rotator cuff and gluteus medius strengthening are specifically important when trying to prevent the common overuse injuries. Rotator cuff strengthening will improve power with serving and spiking. Gluteus medius strengthening can help to control and decrease the stress going through the knee with jumping and landing. Incorporating single leg exercises will also help to improve balance and body control.
  • Interval training – Because volleyball is quick intervals, performing ladder drills, plyometrics, shuffling, and shuttle drills can address directional changes while working on quick cardiovascular demands. 
  • Perform dynamic warm up prior to playing and a cool down when done. 
  • Get adequate sleep.
  • Get enough rest and recovery.

If you have any questions on how to develop a program either during the off season or in season for volleyball to help keep you injury free, contact FX Physical Therapy! 

The post Volleyball: Common Injuries and How to Prevent Them appeared first on FX Physical Therapy.

Thursday, August 20, 2020

Good Sore vs Bad Sore – When to Keep Pushing.

We’ve all been there. You took a little too much time off from exercising and now that you’ve finally made your triumphant return to the gym (or track or treadmill or field etc). You wake up the next day wishing you had an escalator to get downstairs. 

Figuring out how much is too much can be hard enough for the average gym goer, but when you’re a patient rehabilitating from an injury it can be very challenging to know how hard to push yourself while performing your home exercise program. Before we dive into the specifics, let’s define a couple terms. 

  1.  For the purposes of this post, soreness refers to “muscle soreness” – it’s the painful feeling you sometimes get in a muscle for 24-48 hours after working out and it’s different from the “symptoms” that brought you into physical therapy. This soreness is normal and doesn’t suggest you did anything wrong. This is the good sore! As your body adapts and you continue to work out more regularly, the intensity and duration of that soreness will likely diminish, so if you’re a bit sore after getting back into exercising, don’t be discouraged!
  2. Let’s define symptoms: Symptoms are, quite simply, the pain you feel that brought you into physical therapy. This pain could be in a muscle, a bone, a joint or even related to an irritated nerve. This is the bad sore!! Regardless, it’s important that when performing your home exercise program that you follow the guidelines given to you by your physical therapist and you pay attention to the difference between soreness and symptoms.

So how hard do I go?

Well, as always in physical therapy – it depends. Let’s work through a couple examples:

Example 1, the green light:

Since a flare up in symptoms sometimes manifests 24-48 hours after exercising or engaging in activity, you should start your first couple workouts at a moderate intensity to see how your body responds. If you have some muscle soreness but not swelling or symptoms you’re in the clear, you got the good sore! Feel free to continue exercising – just make gradual increases in your volume and intensity as prescribed by your therapist.

Example 2, the yellow light:

You begin your exercise program and during your workout everything seems relatively fine. You have some low-level symptoms that you might rate on a 2-3/10 (if 0 is no pain and 10 means you are currently on fire and being attacked by bees). After your workout, you have a little discomfort but you don’t notice any increase in swelling or any notable uptick in your symptoms. In this case, unless your therapist has stated that they don’t want you experiencing any pain or symptoms while exercising, you’re still clear to continue – but hold off on progressing the volume or intensity of your next workout until checking in with your PT. Having some minimal symptoms during your workouts isn’t the end of the world, but it’s a yellow light because 

  1. There are some cases where we do want to avoid symptom reproduction (if you’re not sure, clarify with your PT).
  2.  Even in the cases where symptoms are okay, we want to monitor them to make sure they are getting better and not worse as you continue through your rehab.

Example 3, the red light:

You begin your exercises and during your workout you notice an increase in your pain (let’s say a 5 or more out of 10.) While it’s rare that this occurs during performance of your home exercise program, in this case, your body is telling you that you’re not quite ready for this. If there are exercises that you can perform that aren’t bothersome, you can continue with those, however, it’s important that you check in with your physical therapist to let them know how your body responded. It’s very likely that your PT can chat with you over the phone or email to make some modifications prior to your next visit.

We hope this helps give you some guidelines in gauging how hard to push yourself.  Keep in mind that sometimes we just have off days. Maybe you didn’t eat or hydrate enough and maybe you didn’t sleep great the night before, all of these factors can change your response to activity and exercise so make sure you’re listening to your body. However, as always, the best person to ask about what you should be feeling during your workouts is your therapist. If you ever have any questions, contact FX Physical Therapy and we’ll make sure you feel comfortable and in control of your programming. 

The post Good Sore vs Bad Sore – When to Keep Pushing. appeared first on FX Physical Therapy.

Friday, August 14, 2020

Soccer Injury: When To Walk It Off and When To Get Help

Soccer, better known as football worldwide, is the most widely played sport in the world with roughly 265 million people who participate in organized leagues. That does not include the people that play for fun as their social outlet or preferred method of exercise for health and wellness. Now as a sports medicine physical therapist that is a diehard soccer fan you can imagine those stats on the number of people playing make me happy but also concerned for injury rates.

Regardless of the sport you are involved in, injury is unfortunately a part of the game and we do our best to prevent, reduce, stop, or whatever word makes you feel better when marketing to the soccer community. It is all semantics in my eyes and the overall message should be how can we help these athletes stay on the field, having fun, and enjoying the beautiful game. This is where the soccer community needs some education, especially in the United States, where the “rub some dirt on it” mentality is a foundation of our tough guy image.

It is important to realize that every knock you take or ache that you feel does not mean you run to your sports medicine team in a panic. One of my favorite quotes from a leader in the rehabilitation community is

“Every hurt does not equal harm”, Craig Liebenson DC.

What he means by this is that our body interprets pain in many different ways and that we do not need to sound the alarm with every ache we feel. When these pains impact our ability to participate then we need to address it and train our body to be more resilient.

For soccer players, the best approach is to have our coaches involved in the tracking process of these bumps, bruises, aches and pains. If a coach is seeing these injuries impact time in training, performance in a match, or an athlete is having recurring complaints then they should be referred out to someone in their sports medicine network to identify and manage the issue. The most important part of soccer development is being available to play. You can not improve if you constantly miss time.

The thing I hear most often from youth soccer players that end up in my PT office after an injury has limited their time on the field is, “My physician told me to rest 6 weeks and then I can go back to playing”. No, rest is not always a bad thing, but rest should have a different meaning in the sports rehabilitation world, and that is actively recovering and preparing for a safe return in 6 weeks, 8 weeks, or even 1 week. The time does not matter from my perspective as long as you are able to prepare for the demands of your sport and reduce the variables that you have control of.

So when do I walk it off? Well that answer is simple in my eyes, when the knock you take doesn’t decrease your performance, cause you to miss time from your sport, or does not make you second guess yourself on the field.

Mentally feeling ready to go back to sport is just as important to your physical well being as the injury itself. So my message to all the soccer fans, players, coaches, and sports medicine teams: Track your injuries, monitor your performance or ability to participate, communicate with the coaches and sports medicine team, and most importantly make sure you are having fun! Building resilient soccer players will improve the performance of each individual and their contribution to the team.

The post Soccer Injury: When To Walk It Off and When To Get Help appeared first on FX Physical Therapy.

Thursday, August 6, 2020

The Importance of Exertion Testing with Concussions

When an athlete suffers from an orthopedic injury, they go through testing to determine if they are safe to return to their sport. The most common example of this is when an athlete tears their ACL and has to pass a variety of tests to show that they are capable of safely returning to their sport. 

Why should concussions be any different? 

There is a misconception that once an individual is symptom free following a concussion, they are ready to return to activity and sport. Decisions made solely based on symptoms can be inadequate. Symptoms are subjective and do not accurately depict the physiological time frame of recovery. A patient may feel as though they have returned to their normal self, however there may still be some cognitive, visual, or vestibular abnormalities not sensed with everyday challenges. 

The brain is still vulnerable while it is still in recovery. 

When another trauma occurs before full recovery has taken place, it can lead to an extended time frame of symptoms, additional damage to the brain, and in some cases, death. A study recently showed that performing physical exertion testing in concussion protocols can prevent ~15% of high-risk athletes from returning to sport too soon. 

So what is exertion testing?

Exertion testing consists of a cardiovascular portion, vestibular/ocular motor testing, dynamic circuit, functional testing, and sport specific drills. Before and throughout the testing process, vitals and self reported symptoms are recorded. In order to pass testing, the athlete must remain symptom free throughout the testing and for the 24 hours following. The athlete must also complete the tests with good form and mental competence. 

Utilization of physical exertion testing is one key component of a concussion protocol.

Contact FX Physical Therapy if you have any questions regarding our concussion protocol! 

The post The Importance of Exertion Testing with Concussions appeared first on FX Physical Therapy.

Friday, July 31, 2020

4 Physical Therapy Exercises That Reduce Shoulder Pain

Written by: Dr. Colin van Werkhoven PT, DPT, CSCS


Suffering from shoulder pain? Physical therapy mobility and strength exercises can help improve range of motion and help handle the demands of daily life. FX Physical Therapy offers hands-on treatment to reduce your symptoms with soft tissue work, joint mobilization, and advanced exercises.

Physical therapy management of shoulder pain is not only cheaper than other medical alternatives but sometimes a faster return to activity. Even if surgical options are required, pre-hab exercises improve the time of recovery after the operation.

Here are some ways our FX Physical Therapy team treat shoulder pain!

Mobility


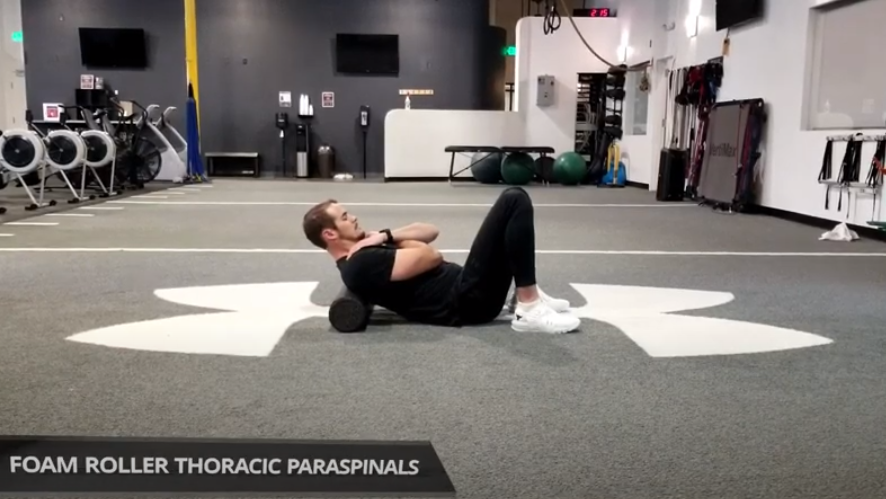
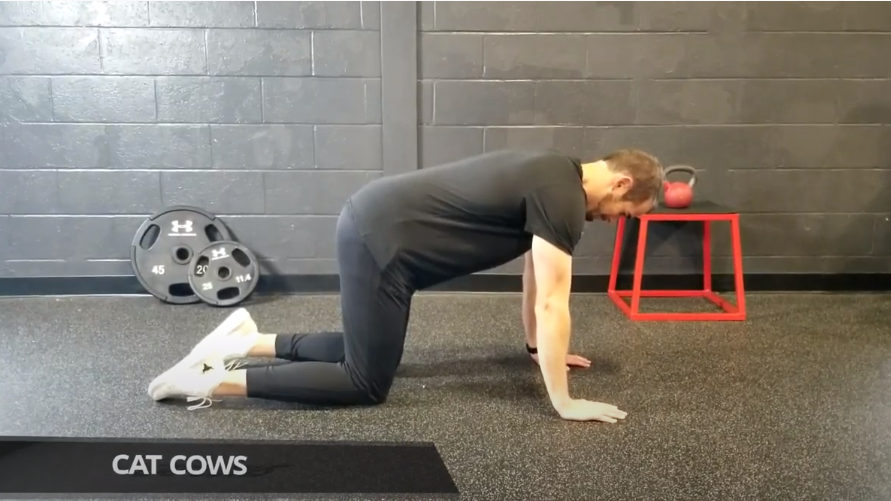
Having good mobility throughout the thoracic spine sets up the shoulder to perform at the highest level possible. If your mid-back cannot move in flexion, extension, and rotation your shoulders are going to take a lot of stress they do not need to when performing activities. Here are some of our favorite ways to mobilize your mid-back:

 Upper Back Foam Roll: Recommendation: Perform for 1-2 minutes
Click Image below to access videos

Foamroller

Cat Cows: Recommendation: Perform 3 sets, 10 reps in each position

Cat Cow

Strength


After you have mobilized your mid-back it is time to strengthen your back and shoulders to improve your performance. The mid-back musculature has been shown to have a great benefit on long term shoulder health, posture, and strength for activities like carrying, pushing, and pulling objects. The exercises are shown below also offer rotator cuff strengthening, shoulder stabilization, and movement control. Combining back and shoulder training together allows us to offset the nature of having an anterior (chest) dominant position most of our day that pulls our shoulders forward which lead to limitations in range of motion of the back and shoulders. These exercises will help counteract this position and put the stress of daily life on the larger muscles that do not get tired as quickly.


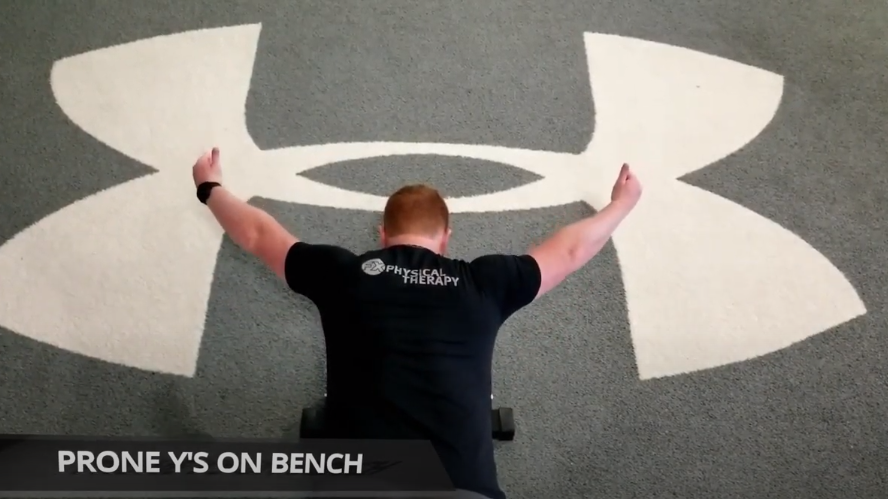
 Prone on Bench Y: Recommendation: 3 sets, 12 reps

 Y

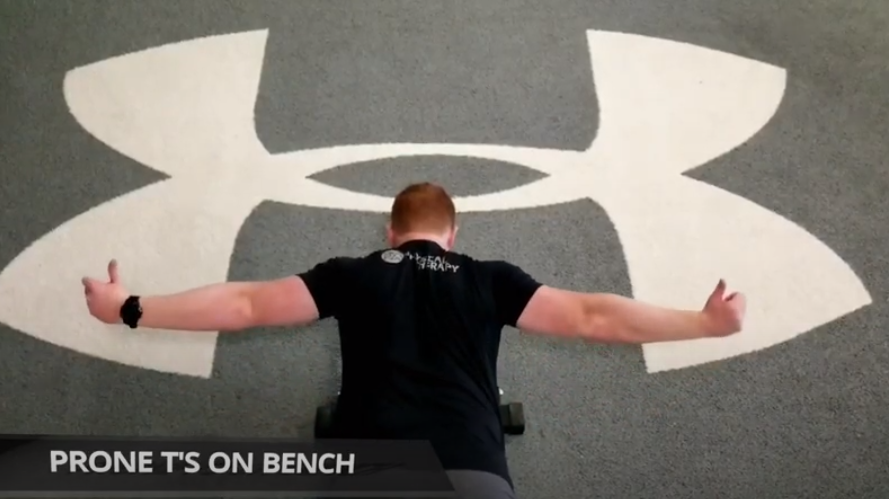
  Prone on Bench T: Recommendation: 3 sets, 12 reps

TBench


For a customized therapy plan to address your specific needs – Call our team today at 443-595-7798 or click here to request an appointment.


The post 4 Physical Therapy Exercises That Reduce Shoulder Pain appeared first on FX Physical Therapy.

Thursday, July 30, 2020

Physical Therapy for Pre and Postpartum

If you are pregnant or postpartum, you are aware that your body has gone through significant changes. Throughout pregnancy, there are changes that occur within the musculoskeletal, nervous, and endocrine systems. You may notice common aches and pains such as upper and lower back pain, as well as hip and sacroiliac joint pain. 

A Physical Therapist can help with prevention and healing from the repercussions of pregnancy.

When a woman becomes pregnant, her endocrine system releases a hormone called relaxin.  This hormone is responsible for relaxing the ligaments in the pelvic girdle to allow for opening of the birth canal to prepare for the baby.

Our pelvic girdle is the center of our body. Think of it as the foundation of a house. This joint complex must be stable in order to maintain stability throughout the rest of the body, especially the spine and hips. You can imagine that once the pelvis becomes stretched due to release of relaxin, some stability is lost. There is a domino effect throughout the kinetic chain to the low back and hips.  

How can Physical Therapy help?

Having a strong core and stable hips will help to improve spinal and pelvic stability. When most people think of the ‘core’ they think of six pack abs, or rectus abdominis. However, your core goes beyond and deeper to stabilize your spine and pelvis. Muscles such as the transverse abdominis, multifidus, internal/external obliques, diaphragm and the pelvic floor make up our natural corset. Physical Therapy can help to activate and engage these muscles, thus reducing typical aches and pains. Core stabilization exercises are imperative for patients who have diastasis recti and those who have received a C-section. 

Exercises to get started:

Below are a few baseline exercises you can begin with to activate the deep core. As always, consult with your OBGYN before beginning these exercises. For progressions and more education on how to further stabilize your spine and pelvis, please contact one of our Physical Therapists at FX Physical Therapy!

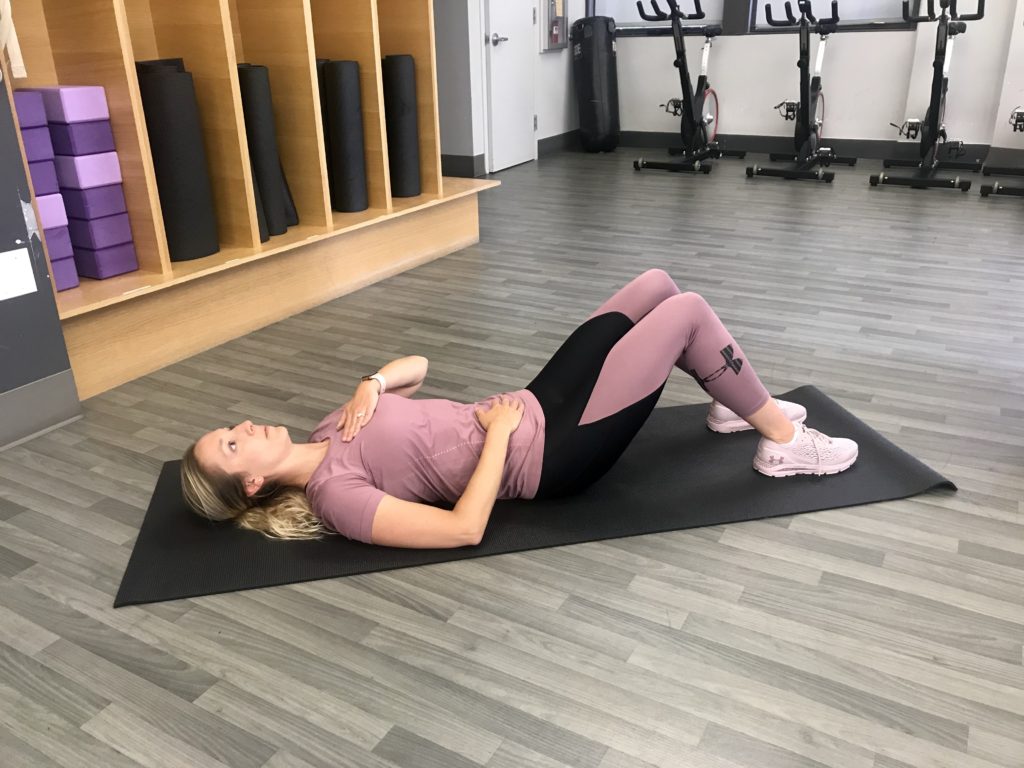
  1. Diaphragmatic Breathing:
    1. Begin lying on your back with knees bent.  
    2. Rest one hand on your chest and the other on your belly. 
    3. Take a deep breath in through your nose, filling up your belly with air.  
    4. Upon exhale, breath out through pursed lips like you are blowing out of a straw, drawing the belly button down to the floor.  
    5. Ensure that when you are inhaling, your chest hand should not be moving.  
    6. You can also perform on hands and knees.

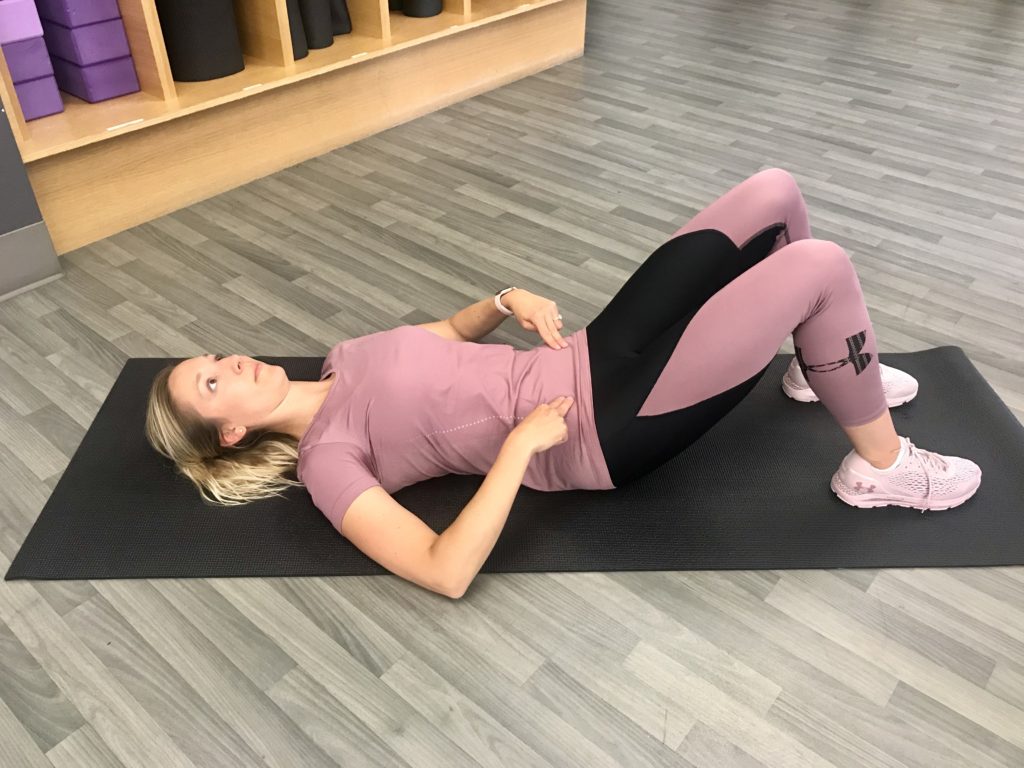
  1. Abdominal Bracing:
    1. Begin lying on your back with knees bent.  
    2. Tuck your tailbone under, flattening your back on the flat surface.  
    3. Brace your abdominal muscles, instead of sucking in your stomach.  
    4. To ensure you are activating the deep core, find your hip bones and move one inch toward your belly button.


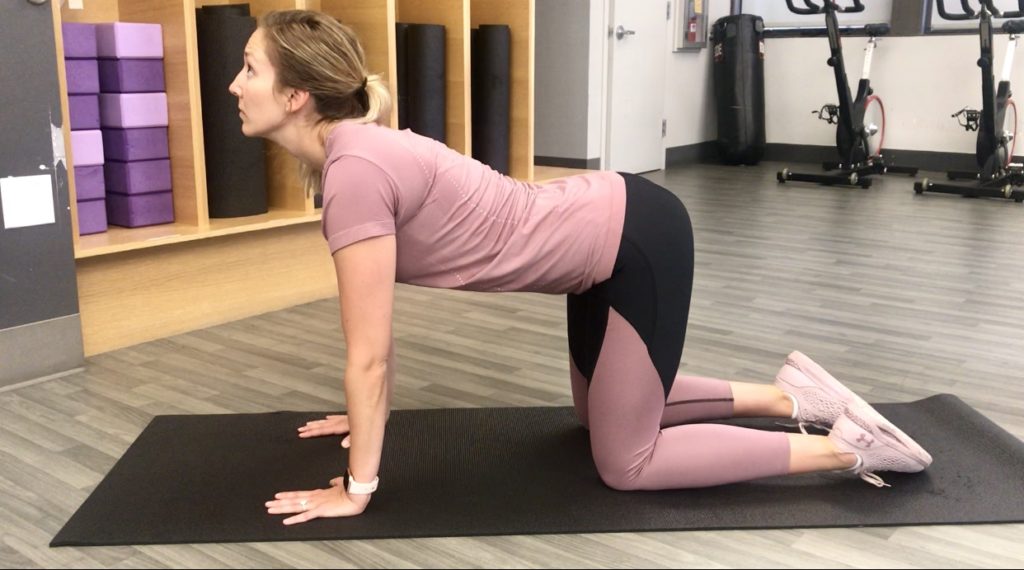
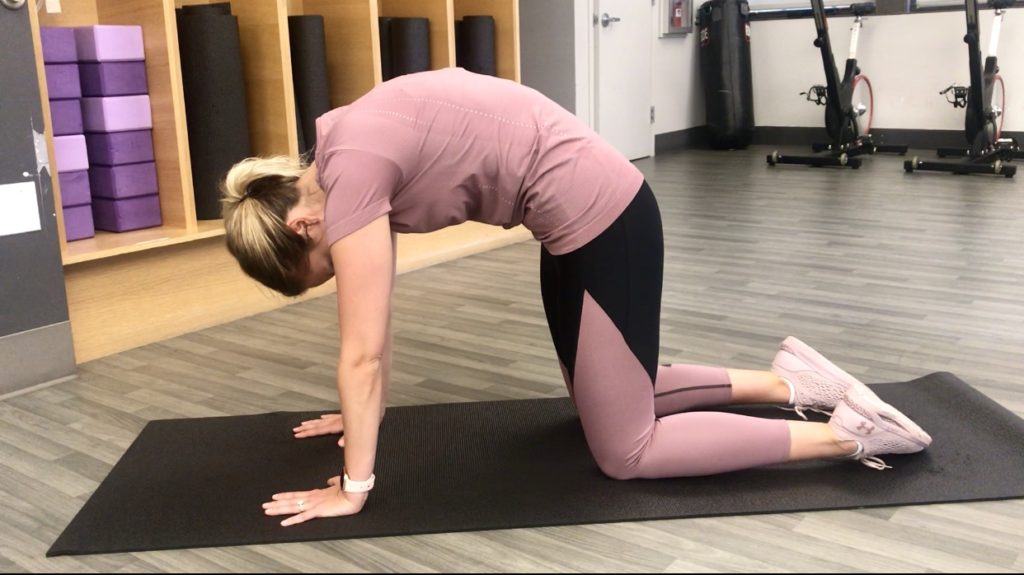
  1. Cat/Camel: 
    1. Begin on hands and knees.  
    2. Take a deep breath in, using diaphragmatic breathing and inhaling air into the belly as you arch your back and look up to the ceiling.  
    3. Exhale the air and activate your abdominals as you curl your spine and tuck your head.  

.   

The post Physical Therapy for Pre and Postpartum appeared first on FX Physical Therapy.

Celebrating 5 Years as FX Physical Therapy: A message from Jerod Felice

FX Physical Therapy Celebrates 5 years! From a single flagship location in Hunt Valley, to 9 different clinics throughout Maryland and Virg...